

If no stop level is posted never assume a stop larger than 1%


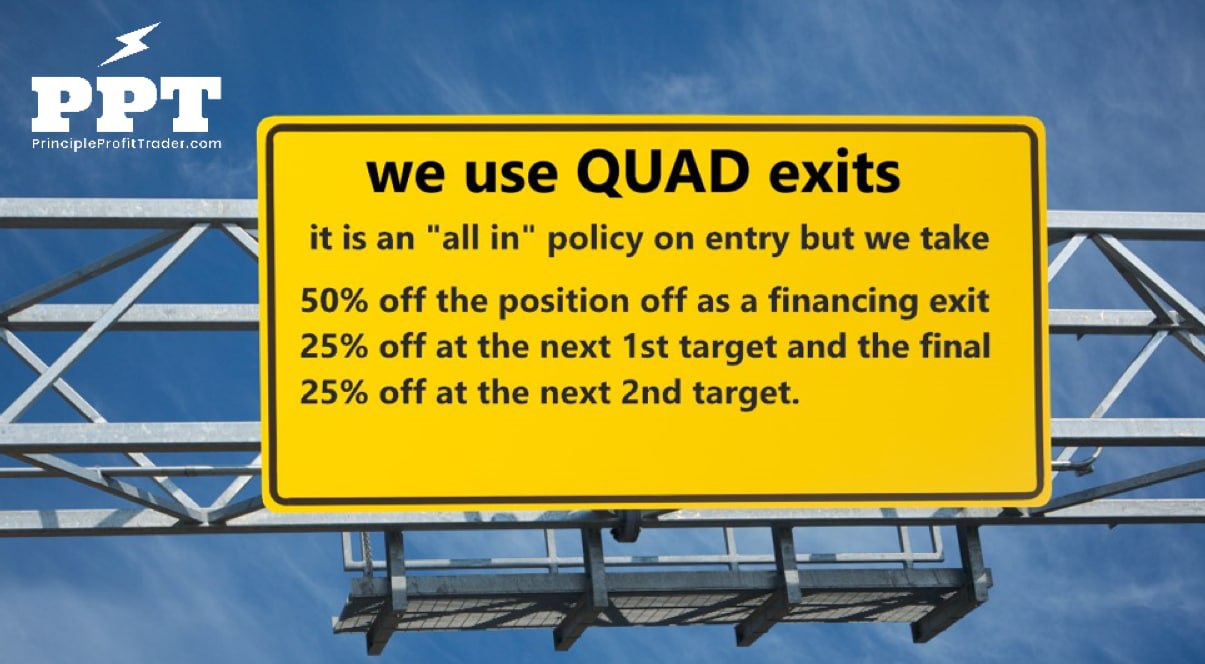
At this point if not otherwise instructed we trail our stop of the remaining position to break even entry levels.


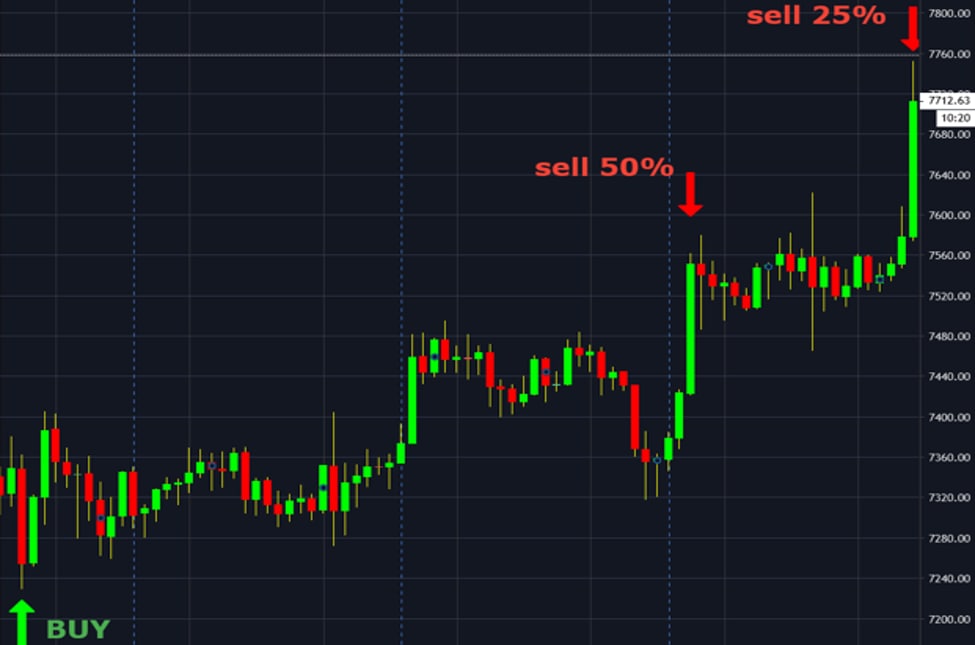
Do not trail your stop at this point any further!


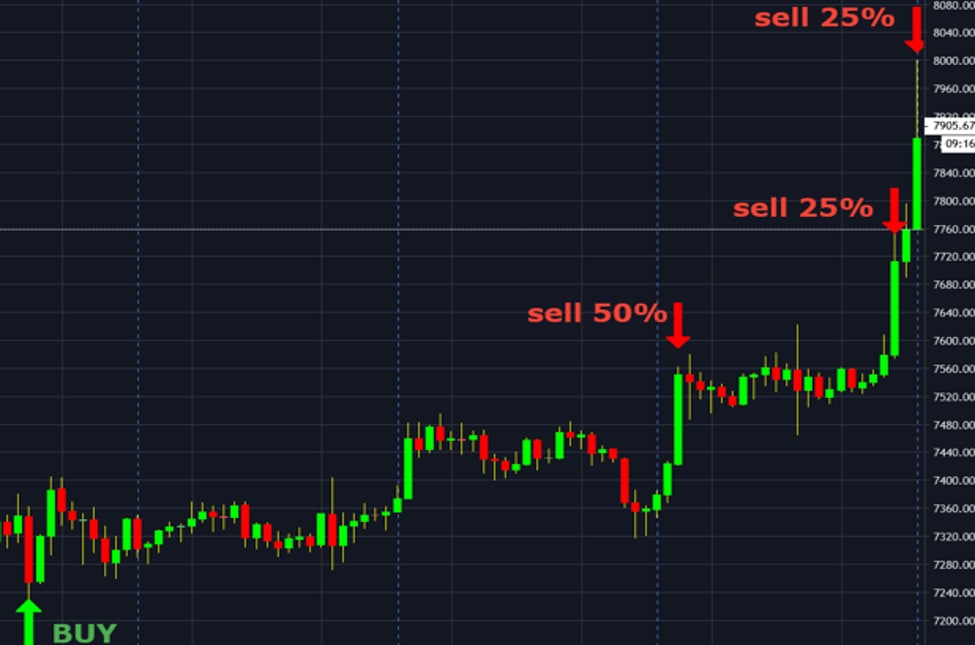
Typically after a trade sequence like this the trade is analyzed.